Secure Swagger on ASP.NET Core by address and port

This follows on from my previous post Secure ASP.NET Core Health Checks to a specific port and assumes that you already have your service running over 2 ports and have specified a ManagementPort in the appsettings.json file.
Special note if you are using http.sys If you want to run this over https you will need to take care of the port reservation and certification binding. I have a explanation of that in the GitHub Repo README.
Swagger is a powerful tool to test your APIs and allow users to easily discover how to consume your APIs, but it can also open up security issues and make it easier for attackers to access your data.
Best practice is to secure access to your Swagger pages using OAuth as described by Scott Brady but in some scenarios it would be better if the Swagger pages are not be accessible externally at all.
As discussed in this GitHub issue, it is not possible out of the box to limit access to a specific URL.
By changing the SwaggerEndpoint to specify absolute URL it is possible to prevent access to the documentation on the public facing URL.
app.UseSwaggerUI(c => {
  c.SwaggerEndpoint("http://localhost:1115/swagger/v1/swagger.json", "Login Service API V1");
  c.RoutePrefix = string.Empty;
});
However this still leaves the Swagger homepage accessible displaying an error message due to CORS issues.

To reject all requests to Swagger that are not on an internal address we need to create a middleware, something like this suggestion by Thwaitesy
public class SwaggerUrlPortAuthMiddleware {
  private readonly RequestDelegate next;

  public SwaggerUrlPortAuthMiddleware(RequestDelegate next) {
    this.next = next;
  }

  public async Task InvokeAsync(HttpContext context, IConfiguration configuration) {
    // Make sure we are hitting the swagger path, and not doing it locally and are on the management port
    if (context.Request.Path.StartsWithSegments("/swagger") && !configuration.GetValue<int>("ManagementPort").Equals(context.Request.Host.Port)) {
      // Return unauthorized
      context.Response.StatusCode = (int)HttpStatusCode.Unauthorized;
    }
    else {
      await next.Invoke(context);
    }
  }

  public bool IsLocalRequest(HttpContext context) {
    // Handle running using the Microsoft.AspNetCore.TestHost and the site being run entirely locally in memory without an actual TCP/IP connection
    if (context.Connection.RemoteIpAddress == null && context.Connection.LocalIpAddress == null) {
      return true;
    }
    if (context.Connection.RemoteIpAddress.Equals(context.Connection.LocalIpAddress)) {
      return true;
    }
    if (IPAddress.IsLoopback(context.Connection.RemoteIpAddress)) {
      return true;
    }
    return false;
  }
}

Assuming your project layout is something like BaGet.
The middleware should be added to your shared project in the Extensions directory.
Add the following extension method to IApplicationBuilderExtensions to add the middleware and keep your startup clean.
public static class SwaggerAuthorizeExtensions {
  public static IApplicationBuilder UseSwaggerAuthorized(this IApplicationBuilder builder) {
    return builder.UseMiddleware<SwaggerUrlPortAuthMiddleware>();
  }
}
This middleware must be registered before swagger, so in startup.cs change Configure to add the middleware by calling the new extension method.
public void Configure(IApplicationBuilder app, IWebHostEnvironment env) {
  ...
  app.UseSwaggerAuthorized();
  app.UseSwagger();
  app.UseSwaggerUI(c => {
    c.SwaggerEndpoint("/v1/swagger.json", "Login Service API V1");
  });
  ...
}
Now running the service will return a 401 on the public facing URL and serve swagger internally.

It is still recommended to secure swagger with OAuth as a misconfiguration could still lead to your Swagger being exposed this way, for example behind a reverse proxy.
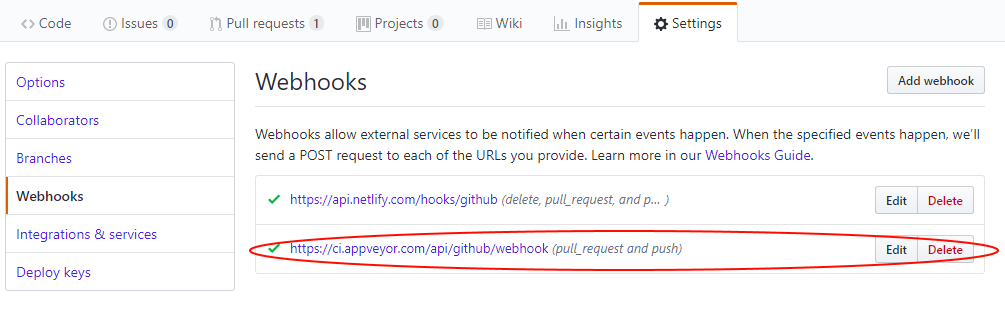 If this is not done AppVeyor will run the master branch config when a draft is saved in NetlifyCMS as a PR is created, it will fail with

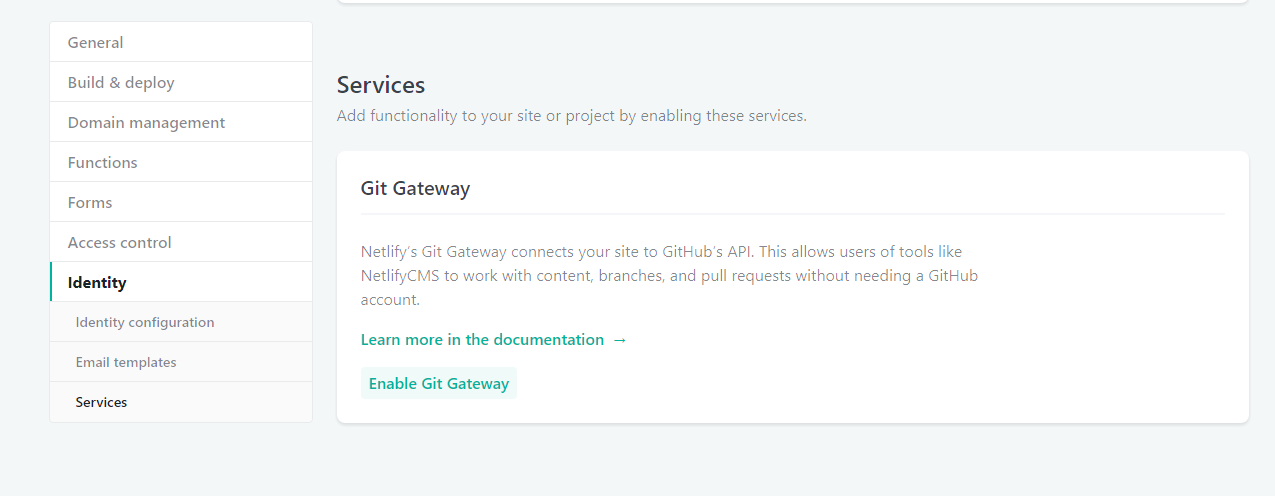 ## Make it easy for user to complete signup by adding Netlify Identity Widget to the site
 :::
:::::: ## Setup your blog on Netlify
The Wyam website already has a guide on
:::
:::::: ## Setup your blog on Netlify
The Wyam website already has a guide on 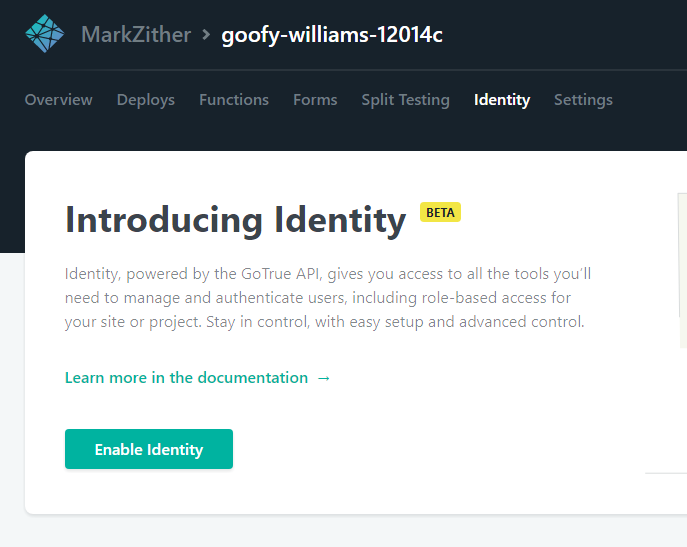 ### Set registration preference and external providers
Registration settings and External providers are in settings under Identity.
### Set registration preference and external providers
Registration settings and External providers are in settings under Identity. 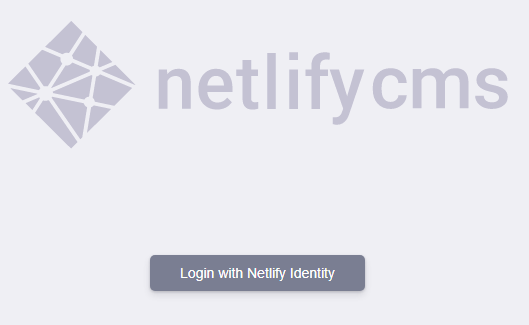 :::
:::::: ::::::row
::: Click Login with Netlify and login with your GitHub account, you might be redirected here to your site on Netlify, just correct the first part of the URL to
:::
:::::: ::::::row
::: Click Login with Netlify and login with your GitHub account, you might be redirected here to your site on Netlify, just correct the first part of the URL to 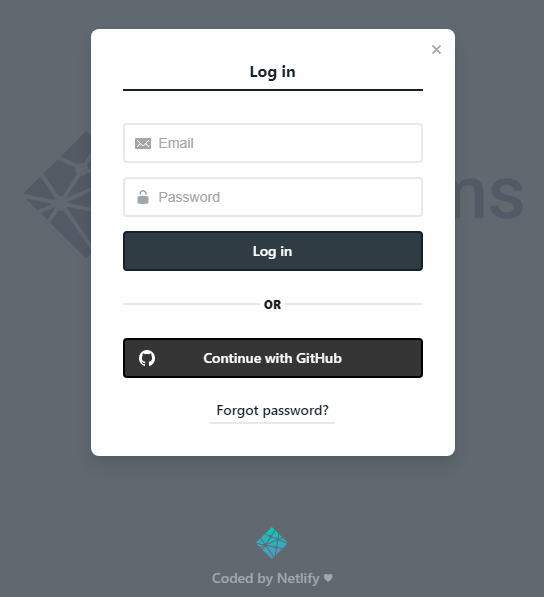 :::
:::::: Finally we have NetlifyCMS in all its glory
:::
:::::: Finally we have NetlifyCMS in all its glory  Create a new post and publish it
 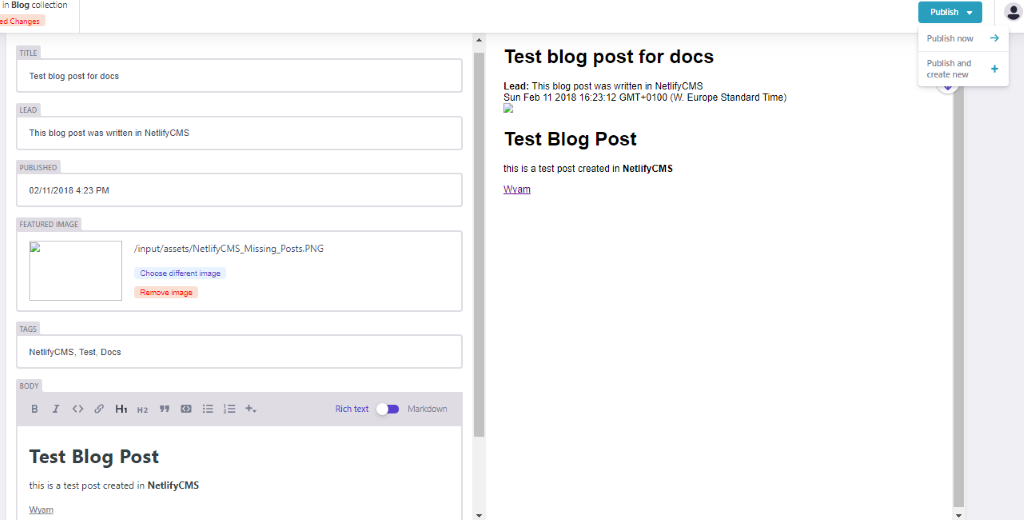 ## NetlifyCMS successfully publishing to GitHub
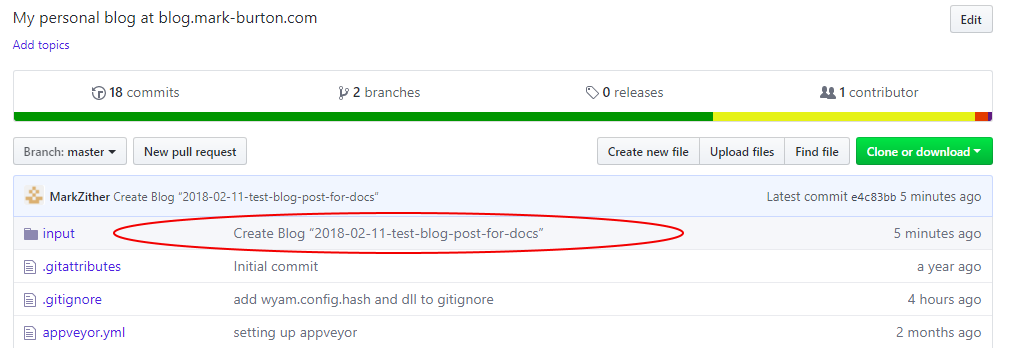 :::
::: and the markdown as rendered in GitHub
:::
::: and the markdown as rendered in GitHub 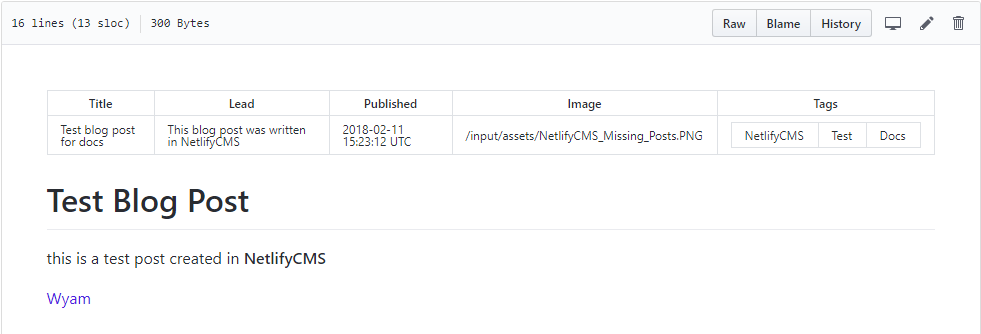 :::
:::::: This is all well and good, but you could have done that in VS Code or similar, in Parts 2 and 3 I will describe how I configured AppVeyor and Netlify to support continuous deployment, the editorial workflow and adding the Netlify Identity widget to my blog to make this a fully functioning CMS. ## Errors and issues I encountered while setting this up
:::
:::::: This is all well and good, but you could have done that in VS Code or similar, in Parts 2 and 3 I will describe how I configured AppVeyor and Netlify to support continuous deployment, the editorial workflow and adding the Netlify Identity widget to my blog to make this a fully functioning CMS. ## Errors and issues I encountered while setting this up :::
:::::: ### Front Matter syntax
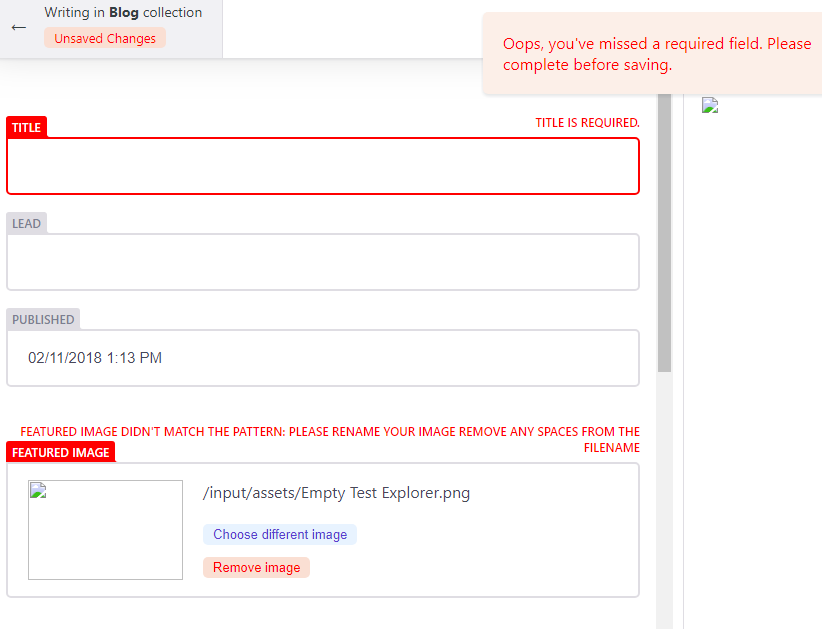
Initially i found that none of my existing posts were displaying any details at all in the CMS, it just showed up as a blank line,
:::
:::::: ### Front Matter syntax
Initially i found that none of my existing posts were displaying any details at all in the CMS, it just showed up as a blank line, 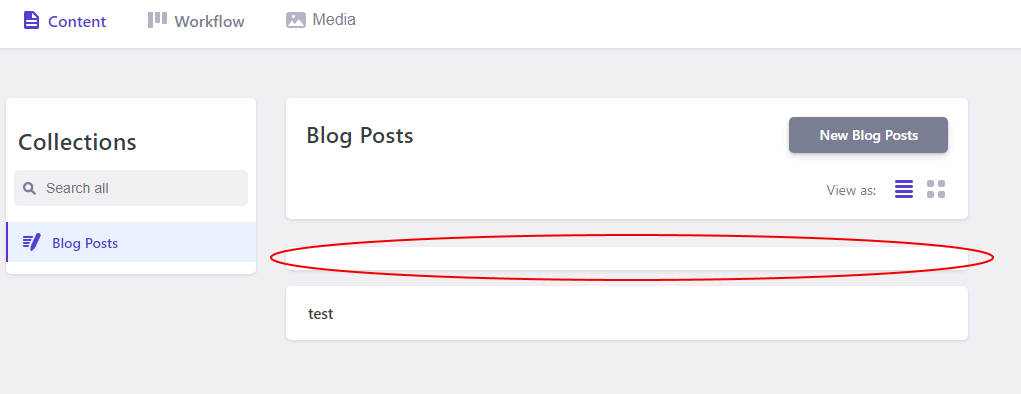 you can click on the blank line and it will open a blank editor window
 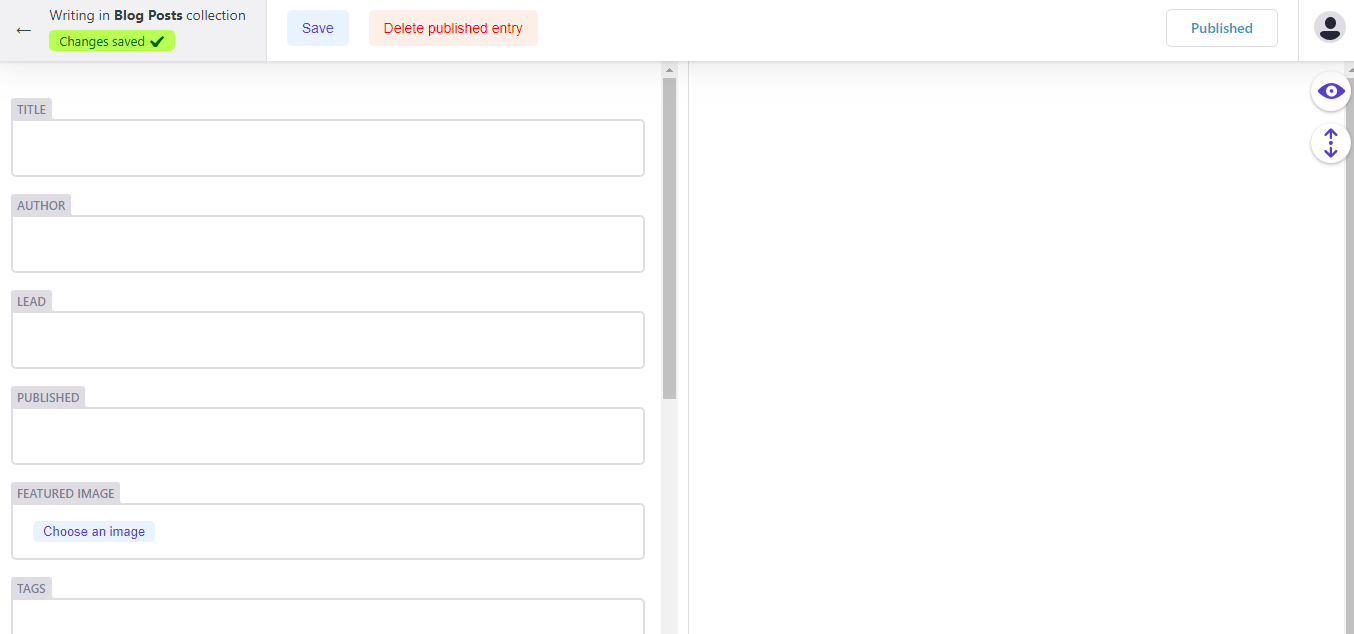 .
Any new posts created by the CMS did display correctly. The only difference i found between the existing posts and those created in NetlifyCMS was the leading
.
Any new posts created by the CMS did display correctly. The only difference i found between the existing posts and those created in NetlifyCMS was the leading